How To Keep Waterproof Outdoor Electrical Box
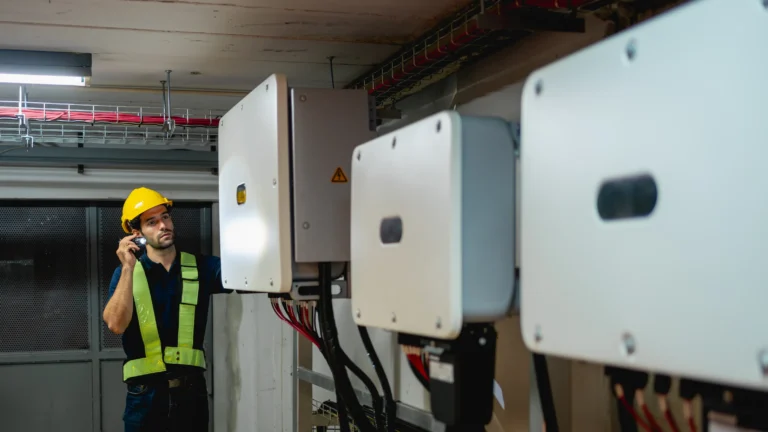
Electrical connections exposed to the elements need reliable protection. That’s exactly what outdoor electrical box provide — shielding wiring from rain, dust, temperature swings, and other harsh conditions. Without adequate waterproofing, these connections risk damage, failure, or even safety hazards.
How do you keep them sealed and secure over time? It takes the right materials, proper installation methods, and consistent upkeep. This guide walks you through proven approaches to waterproof outdoor electrical boxes effectively, helping you safeguard your electrical systems for the long run.
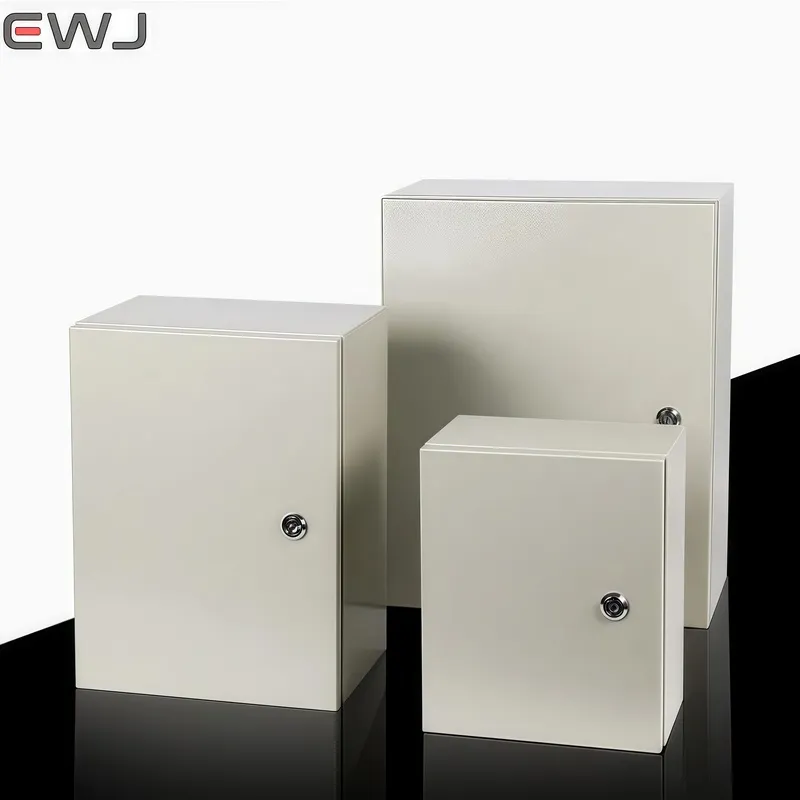
1.Choose the Right Outdoor Electrical Box
Getting the waterproofing right starts before installation — it begins with picking the correct box. Indoor models simply aren’t built to handle outdoor conditions. Use one in an exposed location, and you’re inviting trouble.
Here’s what to focus on when selecting a box:
- Material: Go with options built to resist corrosion. Plastic, stainless steel, and aluminum all hold up well against moisture and weather wear.
- IP Rating: Look for a high Ingress Protection rating. An IP65 or above means the enclosure is well-defended against both water jets and dust penetration.
- UV Resistance: Sunlight breaks down materials over time. A UV-resistant box won’t crack or degrade after months of direct exposure.
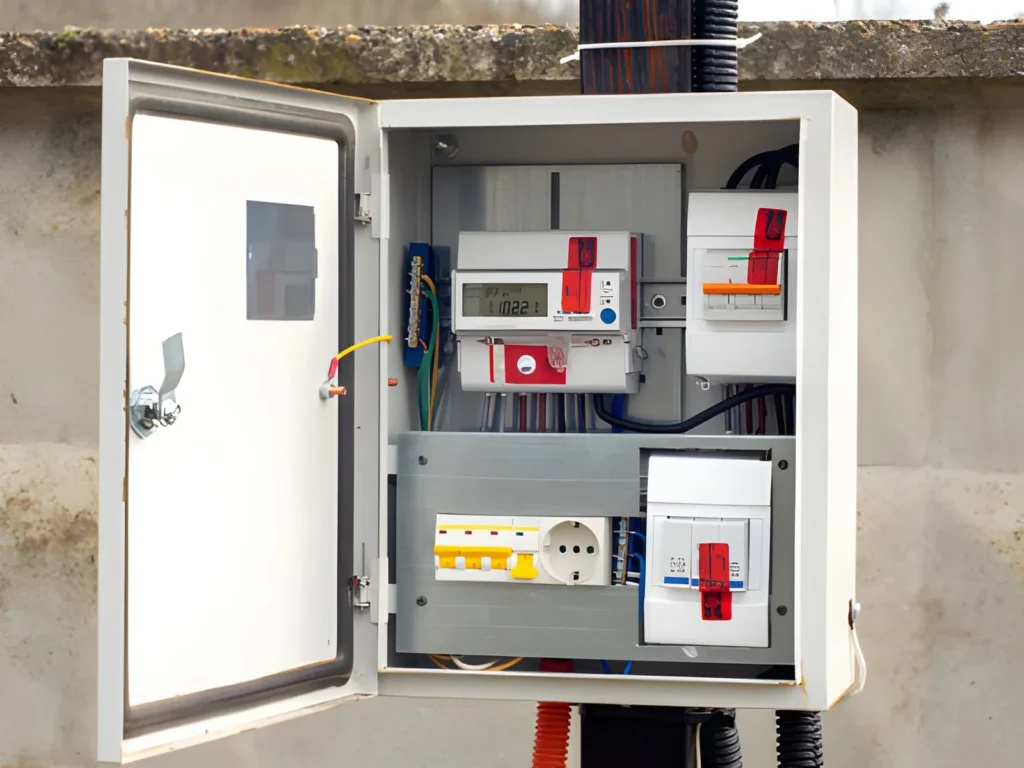
2.Seal All Entry Points
Where cables enter the box — that’s where water finds its way in most often. These openings are the weak spots, and leaving them poorly sealed defeats the purpose of a weatherproof enclosure.
A few methods keep things watertight:
- Use Grommets: Fit rubber grommets or bushings snugly around each cable. They form a firm barrier that blocks moisture from creeping through gaps.
- Apply Sealant: Waterproof silicone works well for closing off small spaces around cable entries and unused knockouts. A thin, even bead goes a long way.
- Cable Glands: Want a more robust solution? IP-rated cable glands offer a secure, professional-level seal. Just make sure their rating matches the box’s specifications.
3.Install a Waterproof Cover
A electrical box is only as good as its lid. If the cover doesn’t seal properly, moisture will get inside — no matter how well the rest is protected.
Here’s how to ensure a tight fit:
- Check Gaskets: A quality gasket lining the lid is your first line of defense. Inspect it before installation. Cracked, worn, or flattened? Replace it immediately.
- Secure Fasteners: Tighten screws or latches evenly across the cover. Uneven pressure creates gaps on one side, and water only needs a tiny opening.
- Locking Mechanisms: Some boxes feature built-in locks that hold the lid firmly in place. These help maintain a steady, consistent seal — especially useful in areas with strong winds or vibration.
4.Position the Box Properly
The best box money can buy won’t hold up if you mount it in the wrong spot. Location matters — a lot. Standing water and direct rainfall can overwhelm even well-sealed enclosures over time.
Smart placement makes a real difference:
- Elevate the Box: Mount it above ground level. Water pools at low points, and a raised position keeps the box clear of puddles and runoff.
- Install Under Shelter: An eave, awning, or overhang offers simple but effective protection. Less direct rain means less stress on seals and gaskets.
- Angle for Drainage: Tilt the box slightly so water runs off and away from cable entries. It’s a small adjustment that prevents moisture from sitting on surfaces where it can slowly work its way in.
5.Use Conduit Systems
Cables running to and from the box need protection too. Conduits act as a shield, keeping wiring safe from moisture, physical damage, and debris along the entire route.
A few tips for getting the installation right:
- Sealed Connections: Where the conduit meets the box, use waterproof connectors to lock the joint tight. A loose connection here is an open door for water.
- Weatherproof Conduit: Stick with materials built for the outdoors. PVC and metal conduits handle rain, humidity, and temperature changes without breaking down.
- Conduit Drainage: Condensation builds up inside conduits — it’s unavoidable. Small drain holes or breathable vent plugs let trapped moisture escape before it reaches the electrical box.
6.Protect Against Condensation
A box can be sealed flawlessly and still end up wet inside. How? Temperature shifts. Warm air cools, moisture condenses on interior surfaces, and over time that buildup threatens your electrical connections.
Here’s how to fight it:
- Desiccants: Drop silica gel packs into the box. They quietly absorb moisture from the air. Simple, cheap, effective — just remember to replace them periodically.
- Breather Vents: IP-rated vents strike a clever balance. They let air circulate to equalize pressure while still blocking rain and dust from getting in.
- Temperature Regulation: Dealing with freezing conditions? A small heating element inside the enclosure keeps the internal temperature stable and prevents condensation from forming in the first place.
7.Regular Maintenance and Inspection
Waterproofing isn’t something you do once and forget. Seals degrade. Materials wear down. Weather takes its toll. Without routine checks, even a solid installation will eventually fail.
Keep this checklist handy:
- Visual Inspection: Look the box over carefully. Cracks, warping, discoloration — any of these signal that the enclosure is losing its ability to keep moisture out.
- Test the Seal: Run your fingers along the gasket and around cable entry points. Gaps? Soft spots? Compression marks that don’t bounce back? Time for a replacement.
- Remove Debris: Leaves, dirt, and grime pile up around outdoor equipment. That buildup traps moisture against surfaces and can slowly work past seals. A quick cleanup every few months goes a long way.
8.Choose Waterproof Accessories
The junction box itself is only one piece of the puzzle. Every component attached to it needs to handle the same conditions. One weak link — a standard plug, an unrated switch — and moisture finds its way into the system.
Here’s what to pair with your box:
- Waterproof Switches and Connectors: Any electrical component that connects to the box should carry its own weatherproof rating. Mixing outdoor boxes with indoor-grade parts creates a vulnerability.
- IP-Rated Plugs: Match your plugs and sockets to the box’s protection level. An IP65 box loses its edge when paired with an unrated socket.
- Protective Covers: For components mounted on the exterior, add secondary covers. That extra layer absorbs direct exposure and reduces wear on the primary seals underneath.
9.Test Before Finalizing Installation
Don’t assume everything is sealed — verify it. Testing before you close out the job catches problems when they’re still easy to fix, not after water damage has already occurred.
Three methods worth using:
- Water Spray Test: Grab a hose and simulate a heavy downpour. Direct water at the box from multiple angles. Then open it up and check inside for any signs of moisture.
- Submersion Test: Have a box rated IP67 or higher? Partially submerge it in water for a set period. If it stays dry inside, the seals are doing their job.
- Electrical Test: Once the box has been exposed to water, test every connection. Circuits should function normally with no shorts, faults, or irregularities. Safety comes first — never skip this step.
10.Document the Installation
Records save time down the road. When maintenance is due or an upgrade is needed, detailed documentation means you won’t be guessing about what was installed, where, or how.
Keep track of these details:
- Component Details: Write down the box’s IP rating, material type, and every accessory used in the setup. Replacement parts are easier to source when specs are on file.
- Location and Orientation: Note exactly where the box is mounted and at what angle. This matters for future inspections, especially across large properties with multiple enclosures.
- Maintenance Schedule: Set calendar reminders for periodic checks — gasket replacements, seal inspections, debris removal. Routine upkeep is easy to overlook without a prompt.
Common Mistakes to Avoid
Even experienced installers slip up. Watch out for these frequent errors:
- 1.Using Indoor Boxes Outdoors: They lack the ratings and materials to handle weather exposure. Always confirm the box is purpose-built for outdoor conditions.
- 2.Overtightening Screws: It feels secure, but too much torque warps the gasket. A deformed seal creates gaps instead of closing them.
- 3.Neglecting Cable Management: Tangled or poorly routed cables pull on seals and strain connectors. Neat, organized wiring reduces physical stress on every entry point.
Why Choose EWJ Electric Contractors for Your Outdoor Electrical Needs?
EWJ Electric brings together deep technical skill and a genuine focus on doing things right. There’s a reason Sacramento homeowners and businesses keep coming back.
- Expertise and Experience: Every job is handled by licensed electricians who know the codes inside and out. Whether it’s a fresh installation or a tricky repair, the work meets professional standards — no shortcuts.
- Comprehensive Solutions: Need help picking the right enclosure? Want full installation and ongoing upkeep? Sagan Electric covers the entire process, customized to fit your property and conditions.
- Safety First Approach: Nothing ranks above keeping people safe. Every recommendation, every technique, every material choice is made with one goal — ensuring your outdoor electrical installations stay secure and dependable.
- Local Knowledge: China’s weather has its own quirks. Heat, rain, seasonal shifts — the team understands these challenges firsthand and builds solutions that hold up under real local conditions, not just ideal ones.
Conclusion
Waterproofing an outdoor electrical box isn’t optional — it’s a necessity. Exposed wiring and vulnerable connections lead to costly damage, system failures, and serious safety risks.
The fundamentals are straightforward. Pick the right box. Seal every opening. Position it wisely. Test thoroughly. Then stay on top of maintenance. Each step builds on the last to create a reliable, weather-resistant installation.
For complex projects, bring in a licensed electrician. The investment pays for itself in peace of mind and code compliance. With proper planning and consistent care, your outdoor electrical setup will perform safely and reliably for years.