


From Panel to Grid: Solar Electrical Enclosure Guide for Combiner & Distribution Boxes
Table of Contents
Solar panels turning sunlight into DC power is only the beginning. In real-world installations, the long-term reliability of a PV system often depends on what happens after the module output: how strings are combined, how cables are routed, how protection devices are housed, and how equipment is shielded from weather, dust, and corrosion.
This guide focuses on the solar electrical enclosure layer that protects key PV electrical nodes from harsh outdoor conditions. You will learn what each box does, where it is installed, and how to select durable metal shells and enclosures that support safe, maintainable, long-lasting PV operation.
Looking for PV metal shells and enclosures for your project?
Browse products here: https://ewjele.com/products
Get the terms right: Junction Box ≠ PV Combiner Box
Many purchasing mistakes start with terminology. The word “junction box” can mean different things depending on context, but in PV systems two concepts are frequently confused:
Panel Junction Box (module-level)
A panel junction box is typically mounted on the back of a solar module. It serves as the module’s protected connection point—housing internal electrical terminations and enabling safe, standardized external connections via connectors.
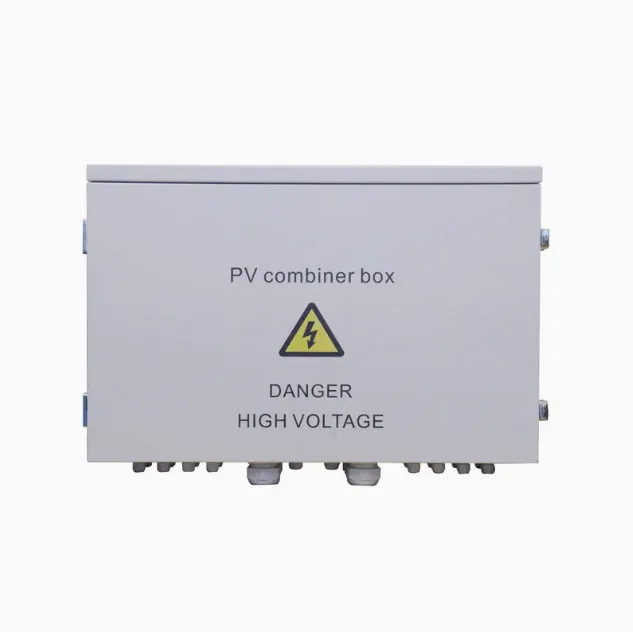
PV Combiner Box (system-level)
A PV combiner box is installed at the system level. Its primary purpose is to combine multiple PV strings into a smaller number of outputs before power goes to the inverter or another downstream device. It is usually mounted on a wall, racking structure, pole, or near the inverter area—often in outdoor or semi-outdoor environments.
Quick rule of thumb
- If it is attached to the module, it is likely a panel junction box.
- If it combines multiple strings and is installed away from the module, it is a PV combiner box.
What a PV combiner box does—and why the metal shell matters
A typical system flow looks like this:
PV modules → strings → combiner box → inverter → AC distribution → grid/load
When string count increases, wiring can become complex and maintenance becomes difficult. A combiner box creates a clean, serviceable electrical node by consolidating string inputs and organizing outputs.
But the most underestimated factor is the enclosure itself. Combiner boxes are frequently exposed to:
- rain, splash, and wind-driven water
- dust and sand
- high UV and thermal cycling
- coastal salt fog and corrosion
- insects and small animals
- vibration and mechanical impacts (installation and service)
A failure mode in the enclosure—poor sealing, weak corrosion resistance, or insufficient mechanical strength—can lead to water ingress, grounding issues, premature component aging, or frequent maintenance.
Key enclosure selection criteria for PV combiner applications
1) Ingress protection and sealing
- Choose the right protection concept for your environment (IP/NEMA approach depending on your market).
- Focus not only on ratings, but on practical sealing: door gasket quality, latch compression, cable entry sealing, and the reliability of hinges and locks.
2) Material and corrosion resistance
- Stainless steel options are common for harsh environments (coastal, high humidity, industrial areas).
- Galvanized steel with appropriate surface finishing is often used in cost-sensitive scenarios with moderate exposure.
- The right choice depends on exposure level, lifespan expectation, and maintenance strategy.
3) Cable entry and cutouts
- Plan cable glands, entry direction, and spacing early.
- Poor cable entry design can undermine sealing and create difficult cable routing—especially when strings grow or layouts change.
4) Mounting method
- Wall mount vs. pole mount vs. rack mount influences backplate design, mounting holes, and mechanical stiffness.
5) Serviceability
- Enough internal routing space
- clear labeling areas
- easy-to-open doors and reliable lock systems
- robust grounding provisions
Distribution boxes in PV systems: DC vs. AC roles (and enclosure priorities)
“Distribution box” can cover multiple system nodes, depending on design. In PV projects, the distribution function typically appears in DC-side consolidation and/or AC-side distribution and protection.
DC distribution (near PV generation)
Depending on design, DC distribution equipment may provide isolation, segmentation, monitoring, or additional protection. The enclosure must manage:
- cable management complexity
- safe clearance and working space
- labeling and circuit identification for commissioning and service
AC distribution (after the inverter)
On the AC side, distribution is often closer to the grid connection or building distribution network. Enclosure selection priorities typically include:
- environmental protection suitable for installation location (indoor / semi-outdoor / outdoor)
- clear access for service
- adequate space for cable bending radius and terminals
- robust door/latching for frequent operation
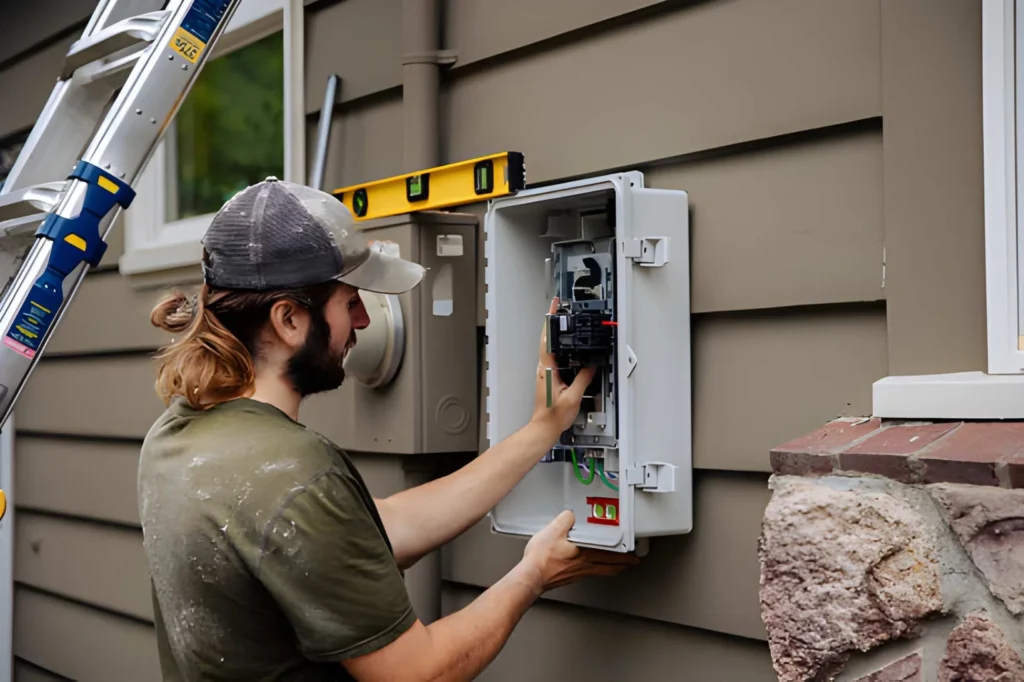
Why a Solar Electrical Enclosure Matters in Outdoor PV Systems
A solar electrical enclosure does more than “house parts.” It protects insulation integrity, prevents moisture ingress, improves cable management, and reduces downtime. In outdoor PV, enclosure sealing, material selection, and service access often determine whether the system remains stable over years of thermal cycling and harsh exposure.
When evaluating an enclosure, prioritize practical build features—gaskets, latching, cable entry design, and corrosion strategy—alongside any nominal rating.
Metal enclosures and cabinets: the reliability layer most projects ignore
Even when internal electrical design is correct, field reliability can be compromised by enclosure weaknesses. In PV, enclosures and cabinets do more than “hold equipment”—they protect the entire electrical interface from environmental and mechanical threats.
Why the enclosure is a reliability multiplier
A well-designed enclosure can:
- reduce moisture-related failures and corrosion
- improve cable organization and commissioning speed
- minimize service time during troubleshooting
- provide a predictable interface for upgrades and expansion
Practical selection checklist for metal enclosures/cabinets
Protection and durability
- Outdoor exposure level (rain, dust, UV, salt fog)
- gasket design and replacement access
- hinge and lock lifespan
Layout and mechanical design
- backplate size and rigidity
- internal routing channels and DIN rail compatibility (if applicable)
- door opening angle and access ergonomics
Material strategy
- match material and surface finishing to exposure and project life
- confirm grounding provisions and hardware quality
Ventilation and heat: why vent covers and louvers are not optional
PV electrical nodes often operate under high ambient temperature and direct solar heating. Enclosure heat buildup can reduce component lifespan and increase nuisance faults. Ventilation must be designed carefully because it can also introduce ingress risks if not executed correctly.
A balanced approach
- Use appropriate vent structures that reduce direct water entry
- Consider dust/insect mitigation (mesh, filters where applicable)
- Keep maintainability in mind—vent solutions must be serviceable
If your enclosures are deployed outdoors, ventilation should be treated as part of the reliability design—not an afterthought.
One-page PV enclosure selection checklist (save this for procurement)
Use this checklist to specify a solar electrical enclosure for your environment, layout, and maintenance needs:
Environment & installation
- Installation location: indoor / semi-outdoor / outdoor
- Exposure: rain splash, dust/sand, direct sun, coastal salt fog, industrial corrosion
- Expected service life and maintenance cycle
Size & layout
- Device layout and cable routing plan
- Reserve extra internal space for wiring and future change
- Door opening clearance and service access
Protection concept
- Required protection level appropriate to local standards and environment
- Door gasket quality and latch compression
- Cable entry sealing (glands, grommets, entry plate design)
Material & surface finishing
- Material choice aligned with corrosion risk
- Coating/finishing system appropriate for exposure
- Hardware quality (hinges, locks, fasteners)
Installation and customization
- Mounting method and hole pattern
- Required cutouts and entry directions
- Labeling/marking requirements for commissioning and maintenance
Common mistakes to avoid
- Confusing module junction boxes with system combiner boxes
This often leads to incorrect size assumptions and missing service features. - Choosing an enclosure based only on a rating label
Look beyond the label: gasket, latch compression, cable entry sealing, and build quality matter in the field. - Underestimating cable entry planning
Improper cutouts or entry direction can create messy wiring, sealing problems, and poor serviceability. - Ignoring corrosion strategy for coastal/high-humidity sites
Material and finishing decisions are project-critical in salt fog environments. - Skipping ventilation planning
Heat management impacts reliability. Vent solutions must balance airflow with ingress control.
Conclusion
In PV systems, reliability is not just about the panels and inverter. The electrical “boxes” between the array and the grid—combiner nodes, distribution points, and protective enclosures—are where real-world exposure and maintenance conditions live.
If your project requires a solar electrical enclosure with outdoor-ready sealing, corrosion resistance, and serviceable design, start with an environment-first selection approach.
FAQ
What is the difference between a junction box and a PV combiner box?
A panel junction box is typically module-level, attached to the back of a solar panel. A PV combiner box is system-level and combines multiple strings into fewer outputs before power goes to the inverter.
How do I choose an outdoor solar electrical enclosure?
Start with exposure (rain, dust, sun, salt fog), then validate sealing design, material/corrosion resistance, cable entry plan, mounting method, and service access.
Is ventilation necessary for outdoor PV enclosures?
It depends on temperature, internal devices, and enclosure exposure, but many PV installations benefit from ventilation design—especially where direct sun or high ambient temperatures cause heat buildup.
What should I prepare before requesting a custom metal shell?
Provide string count and cable entry needs, installation location/environment, target enclosure dimensions, mounting method, and any required cutouts or labeling.